Knowledge Base
How do I create a web form?
In addition to document workflows in which an existing file is used as a template, cloudplan also offers the option of creating a document-independent workflow with a web form. The advantage of the web form is that it is user-friendly, as its responsive design makes it easy to use even on smaller screens such as mobile devices.
Steps to create a web form
1) Enter the project settings and advanced settings.
2) Under “2. Documents / Forms “click on” Add Document “and select” Add Empty Form “
3) Enter the desired participants and click on “Proceed” in the top right corner
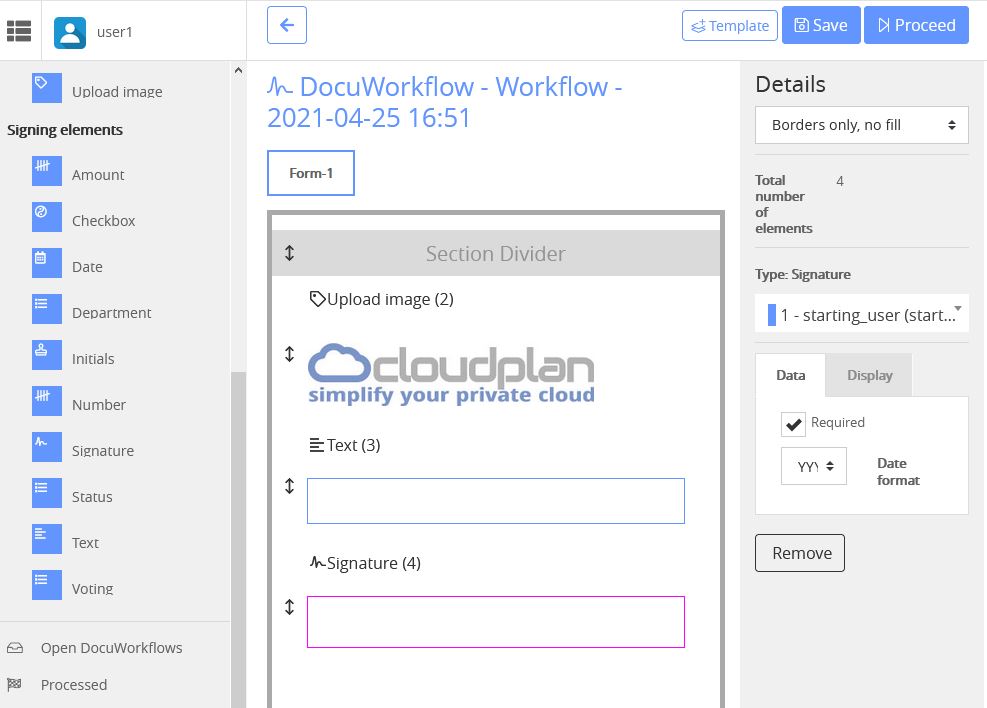
4) You will now see the blank web form in the middle of the screen. On the left-hand side under the main menu there is a white window in which you can select the participants you have just defined. Further down on the left are the “operational functions” and “signature elements” with which you can define the actions for the participants. Position the blue fields in the web form using drag & drop. You can make adjustments in the window on the right.
To visually enhance your web form, you can use dividers (under Operational Functions) or include your logo (upload picture)
Examples:
- Any workflow that does not require a document
- Invoice receipt workflow
- Vacation request
- Supplier information
- Handovers