Knowledge Base
QES = Qualified Electronic Signature
There are different types of electronic signatures, here we look at the “QES = Qualified Electronic Signature”. With QES, a digital signature is added to the document, which can be read using various tools such as Acrobat Reader. It shows the name of the signing user as well as a confirmation of the validity of the signature. It also confirms the integrity of the file, so you can be sure that the file has not been tampered with since it was signed.
Perform the following steps to invite participants to create a QES or AES = Advanced Electronic Signature:
1. Activation of the user for Digital Signing
Let the administrator of your organization activate the user who creates the workflow under Administration / Users for “Digital Signatures”.
2. Create the workflow
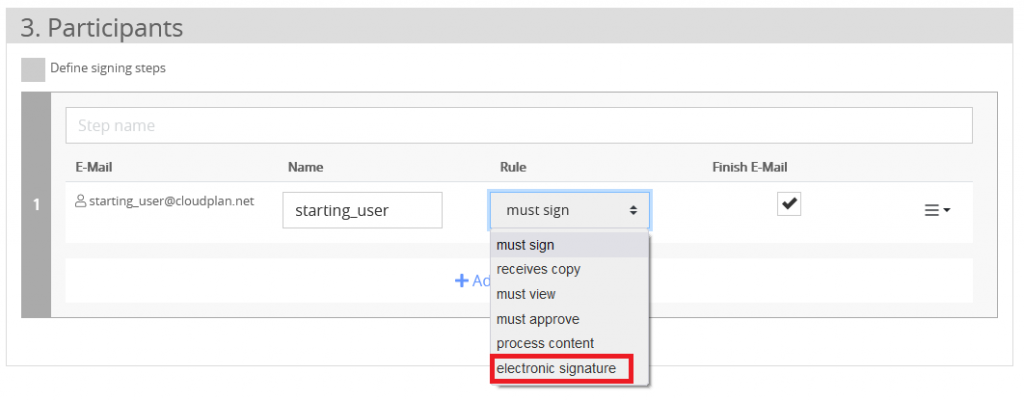
Create a new workflow and note that the last step must be the “electronic signature”, since the content of the document with the digital seal cannot be changed. If, for example, you want to carry out other steps beforehand and, for example, have content filled in, you must add further steps before the “electronic signature” as the last step. You can have as many users as you want to sign digitally.
3. Electronic signature option
Create a new workflow and select the “Electronic Signature” rule:
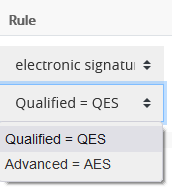
4. QES or AES
Choose between QES = Qualified Electronic Signature or AES = Advanced Electronic Signature.
5. Start the workflow
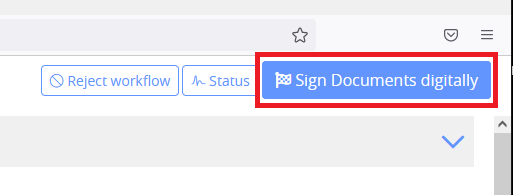
6. Sign digitally
The recipient receives a workflow invitation and sees the following content in order to be able to apply the digital signature.
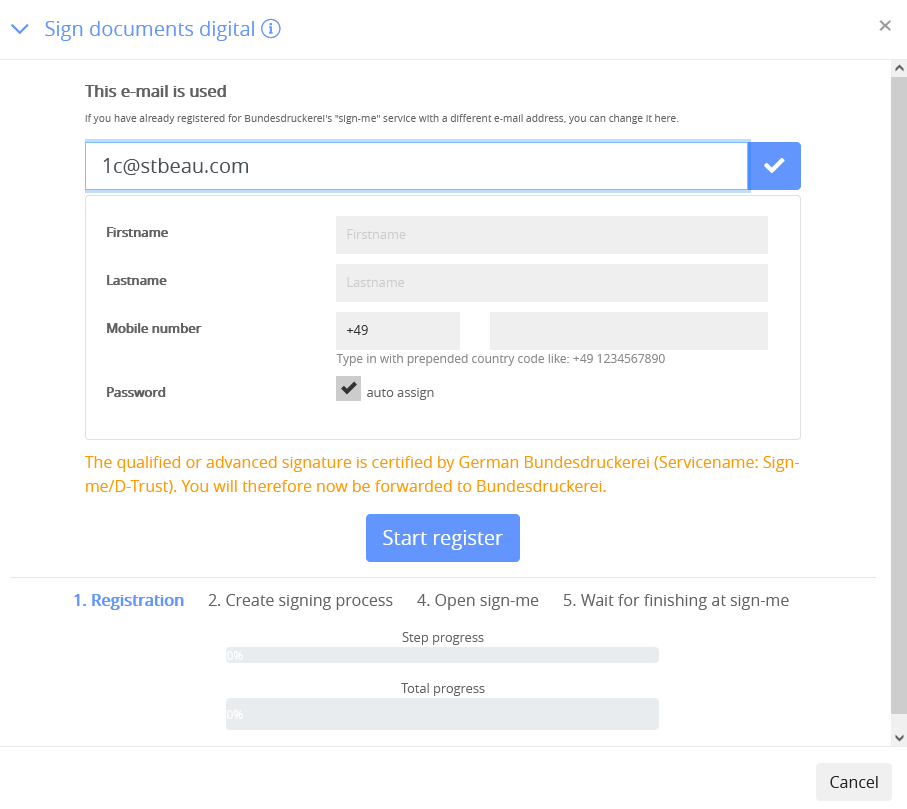
7. Selection of the email address for the signature
In the following step you can check the email address with which you want to create the digital signature. If you already have an account with the agency, Bundesdruckerei / D-Trust (service name: sign-me), please use the corresponding email address.
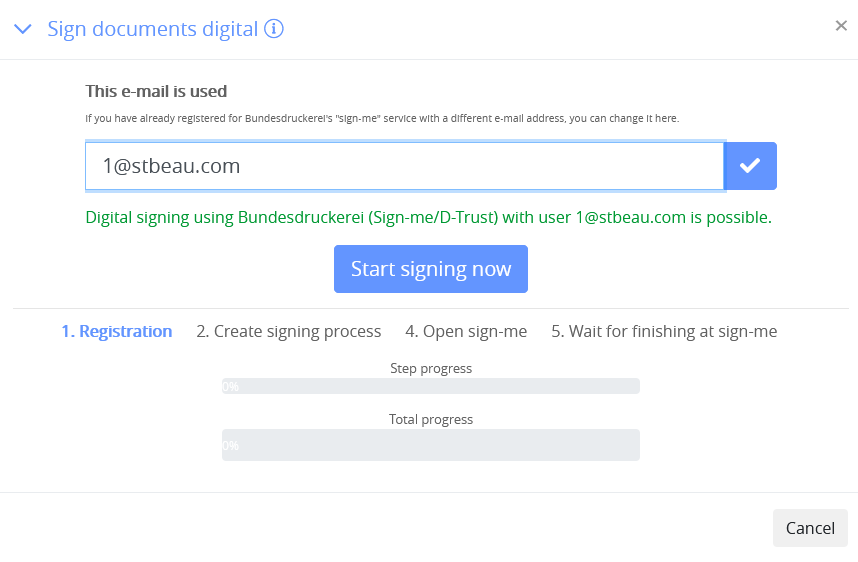
8. Optional: new registration
If you do not yet have an account with Bundesdruckerei, you can register again.
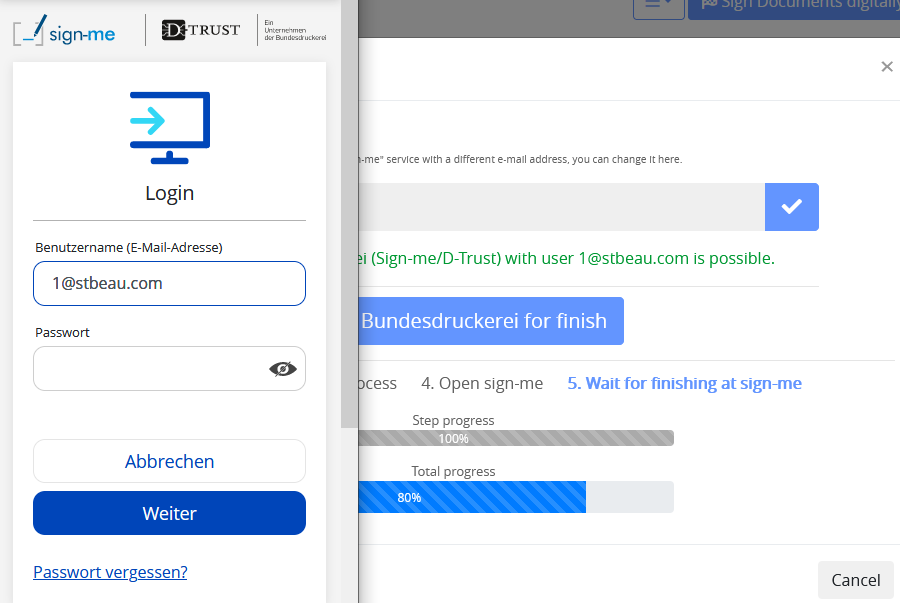
9. Identification
If you have to register again, various identification methods are available. The fastest option would be to use an identity card with a digital signature function. In connection with an NFC reader, as many new smartphones have already installed, you can be identified and signed within a minute.
However, other methods are also available, such as the Videoident method, in which you only need to have a camera on a smartphone or computer and an ID card ready. This procedure takes about 10-15 minutes a little longer.
10. Digital signature
After logging in or registering with Bundesdruckerei and their “sign-me” service, the actual signing takes place in the next step.
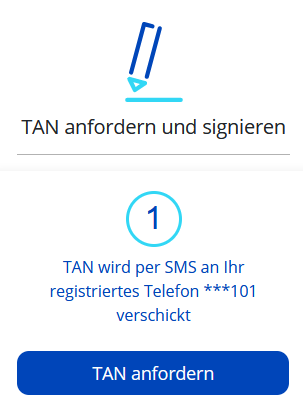
11. Security check via TAN at QES
If you want to sign via QES, an additional check is required by sending a TAN to your mobile number. No TAN is sent with the AES / FES.
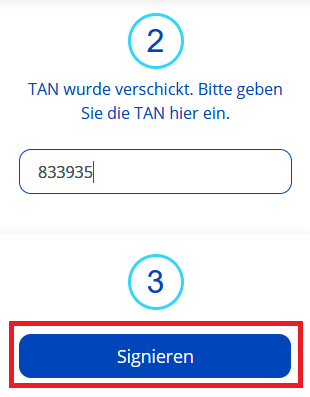
12. Signing approval
Confirm the TAN and then click on “Sign”.
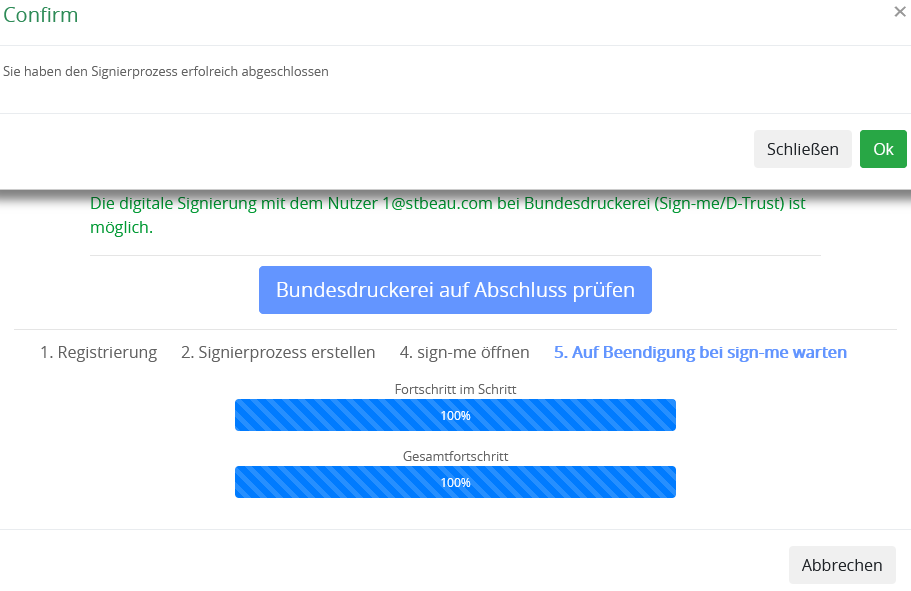
13. Completed signing
You will see in the confirmation that the digital signature has been successfully created. Follow the instructions in the process.
14. Sending and saving the document
The finished document will be sent to the participating users by email. You can read out and check the digital signature with programs such as Acrobat Reader, for example.
The document must not be changed in order to preserve the integrity of the digital signature.
15. Validity
A QES signature is valid within the European Union. Here is the legal evidence:
Which identity documents can be used within the EU?