Knowledge Base
Outlook add-in
The add-in is available for installation at https://appsource.microsoft.com/
It can be made available to your users via Microsoft Office Online.
The following features are offered by the add-in:
– Overview of user-approved files and folders.
– Creation of web links for folders or files that are automatically transferred to an Outlook e-mail.
– The web links can be used for uploading or downloading content.
Perform the following steps:
1) Locate the cloudplan add-in at https://appsource.microsoft.com/
2) You need Office 365 Online to install the add-in
3) Follow the instructions within Office Online
4) Configure for which users the add-in should be provided
5) Depending on the configuration, the add-in automatically appears for the activated users.
6) Create a new mail. Here you use the option “…” at the bottom of the form and select “cloudplan”.
7) The cloudplan add-in opens on the right in the mail form
8) Please log in with your clouplan credentials.
9) Select the desired folder by clicking on the folder itself.
10) Select one or more folders or files by clicking on the name of the folder or file.
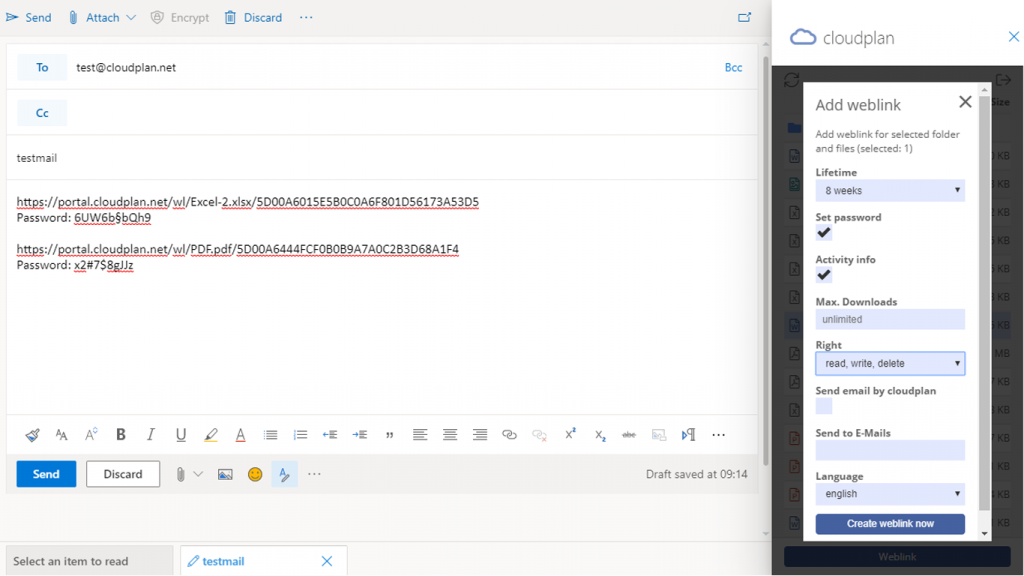
11) Click on “Weblink”.
12) Select the desired options in the Weblink form.
13) Click on “Create weblink”.
14) One or more web links for the selected content are created and automatically transferred to your e-mail.
15) Complete the e-mail as desired and send it.